🐣 "I'm new here"
tl;dr: SpeedyBot helps you efficiently design, deploy, and secure rich conversation systems-- especially in enterprises and large teams with complex requirements
Follow the quick setup below to go from zero to a SpeedyBot running on your local machine (which you can later seamlessly deploy to any infrastructure you want if needed)
Step I: Grab Your Access Token
You'll need a WebEx account to build bots— if you don't have one one, sign up for a new account here: https://signup.webex.com/sign-up
Once you have an account, create a new bot and copy its access token from here: https://developer.webex.com/my-apps/new/bot
The flow to get a token will look roughly like this:

Validate Token
Once you've got your token, pop it into the box below to validate it & review your bot's details
Is this safe??
Your bot token is a highly sensitive credential and should be protected with encryption and proper secrets management.
SpeedyBot does NOT log/persist or do anything (except what you tell it to do) with your bot token.
REMEMBER: If your agent's access token is ever compromised/exposed, you can always invalidate it + get a new one by tapping "Regenerate Access Token" under your agent's settings page

Step II: Send a Test Message with Your Access Token
- Let's test out your bot access token. You can do this by sending yourself a SpeedyCard in a direct message. Feel free to tap the 🎲 for some examples or craft your own code with the editor
- When you're ready, tap the Send Message tab and use the email you signed up with as the destination and hit Send-- in about a second you should receive a new message from your bot
You may have noticed that if you tried to submit any data back from a card that has form inputs-- nothing happens, ex:

In fact, any user interaction with your bot right now— be it a message, SpeedyCard submission, or file upload, results in icy radio silence
That's because there's nobody "home" to answer the request-- SpeedyBot can "listen" for messages (or card data submissions or files) so anytime someone interacts with your bot it will respond back automatically per your instructions
Step III: Setup your SpeedyBot "Listener"
To keep things simple at the start, you'll run the bot from your own machine (meaning when your computer is off, your bot is "off" too). Later, if needed, you can deploy your bot to virtually any standard server or scalable serverless cloud infrastructure you prefer
Getting Started with Bun on Your Computer
Bun is a tool that helps make working with JavaScript faster and easier. It's like a special tool that helps you run JavaScript code really quickly. You can find helpful guides and explanations about Bun here.
Setting up Bun is simple. It ships as a single executable that you can easily install on your computer. If you're not interested in using Bun, that's okay too. SpeedyBot works with many runtimes and infrastructure-- see the NodeJS instructions by tapping the toggle above
Enter the commands below in your terminal to get up and running with Bun:
curl -fsSL https://bun.sh/install | bashpowershell -c "irm bun.sh/install.ps1 | iex"Verify that Bun is installed correctly and available from your terminal-- if you can run bun --version in your terminal and you see a version number you're good to go!
💡 Tips for Windows Users + Bun Questions
Bun is an experimental high-performance JavaScript runtime and toolkit that combines a package manager, bundler, and task runner into one tool.
Note: Install scripts are available for inspection below
- For Mac: install.sh
- For Windows: install.ps1
SpeedyBot can run on any Javascript/Typescript runtime or infrastructue-- Bun just happens to be a speedy and easy way to get up and running
Note for Mac Users
If you're running an older version of Mac OS and you encounter errors when installing Bun try upgrading your operating system
Note for Windows Users
On PC if you're having trouble getting Bun working on Windows/Powershell try the following method instead:
Step 1: Download and run Git Bash https://git-scm.com/download/win
Note: Step-by-step instructions available here: https://www.git-tower.com/blog/git-bash/
Step 2: Run the following command inside Git Bash to setup Bun:
curl -fsSL https://bun.sh/install | bashStep 3: Completely close out from Git Bash
Step 4: Re-open Git Bash again and enter the following command:
bunx --bun create-speedybot@2.0.8 setup --bun --project default --boot --install Boot it up!
Copy the command below into your terminal to turn on your bot
bunx --bun create-speedybot@2.0.8 setup --bun --project default --boot --install git clone --depth 1 https://github.com/valgaze/speedybot
cd speedybot
cd examples/speedybot-starter
bun install
bun util/cli.ts setup __ACCESS__TOKEN__HERE__
bun --watch util/launch.tsTalk to Your Bot
Now send a message to your bot and you'll see a welcome screen with buttons and cards:
You can turn off your bot by holding down CTRL-C on your keyboard or exiting the terminal. To turn your bot back "on", open your terminal to your project directory and enter bun run dev
Note: when you press CTRL-C the terminal will display the location of your bot
Step V Customize your Bot
🎉 Congrats! You have a bot running on your machine!
Now it's time to make it useful just for you. To customize your bot's behavior or responses, you'll need a code editor. One popular choice is Visual Studio Code.
For installation details, visit https://code.visualstudio.com/download
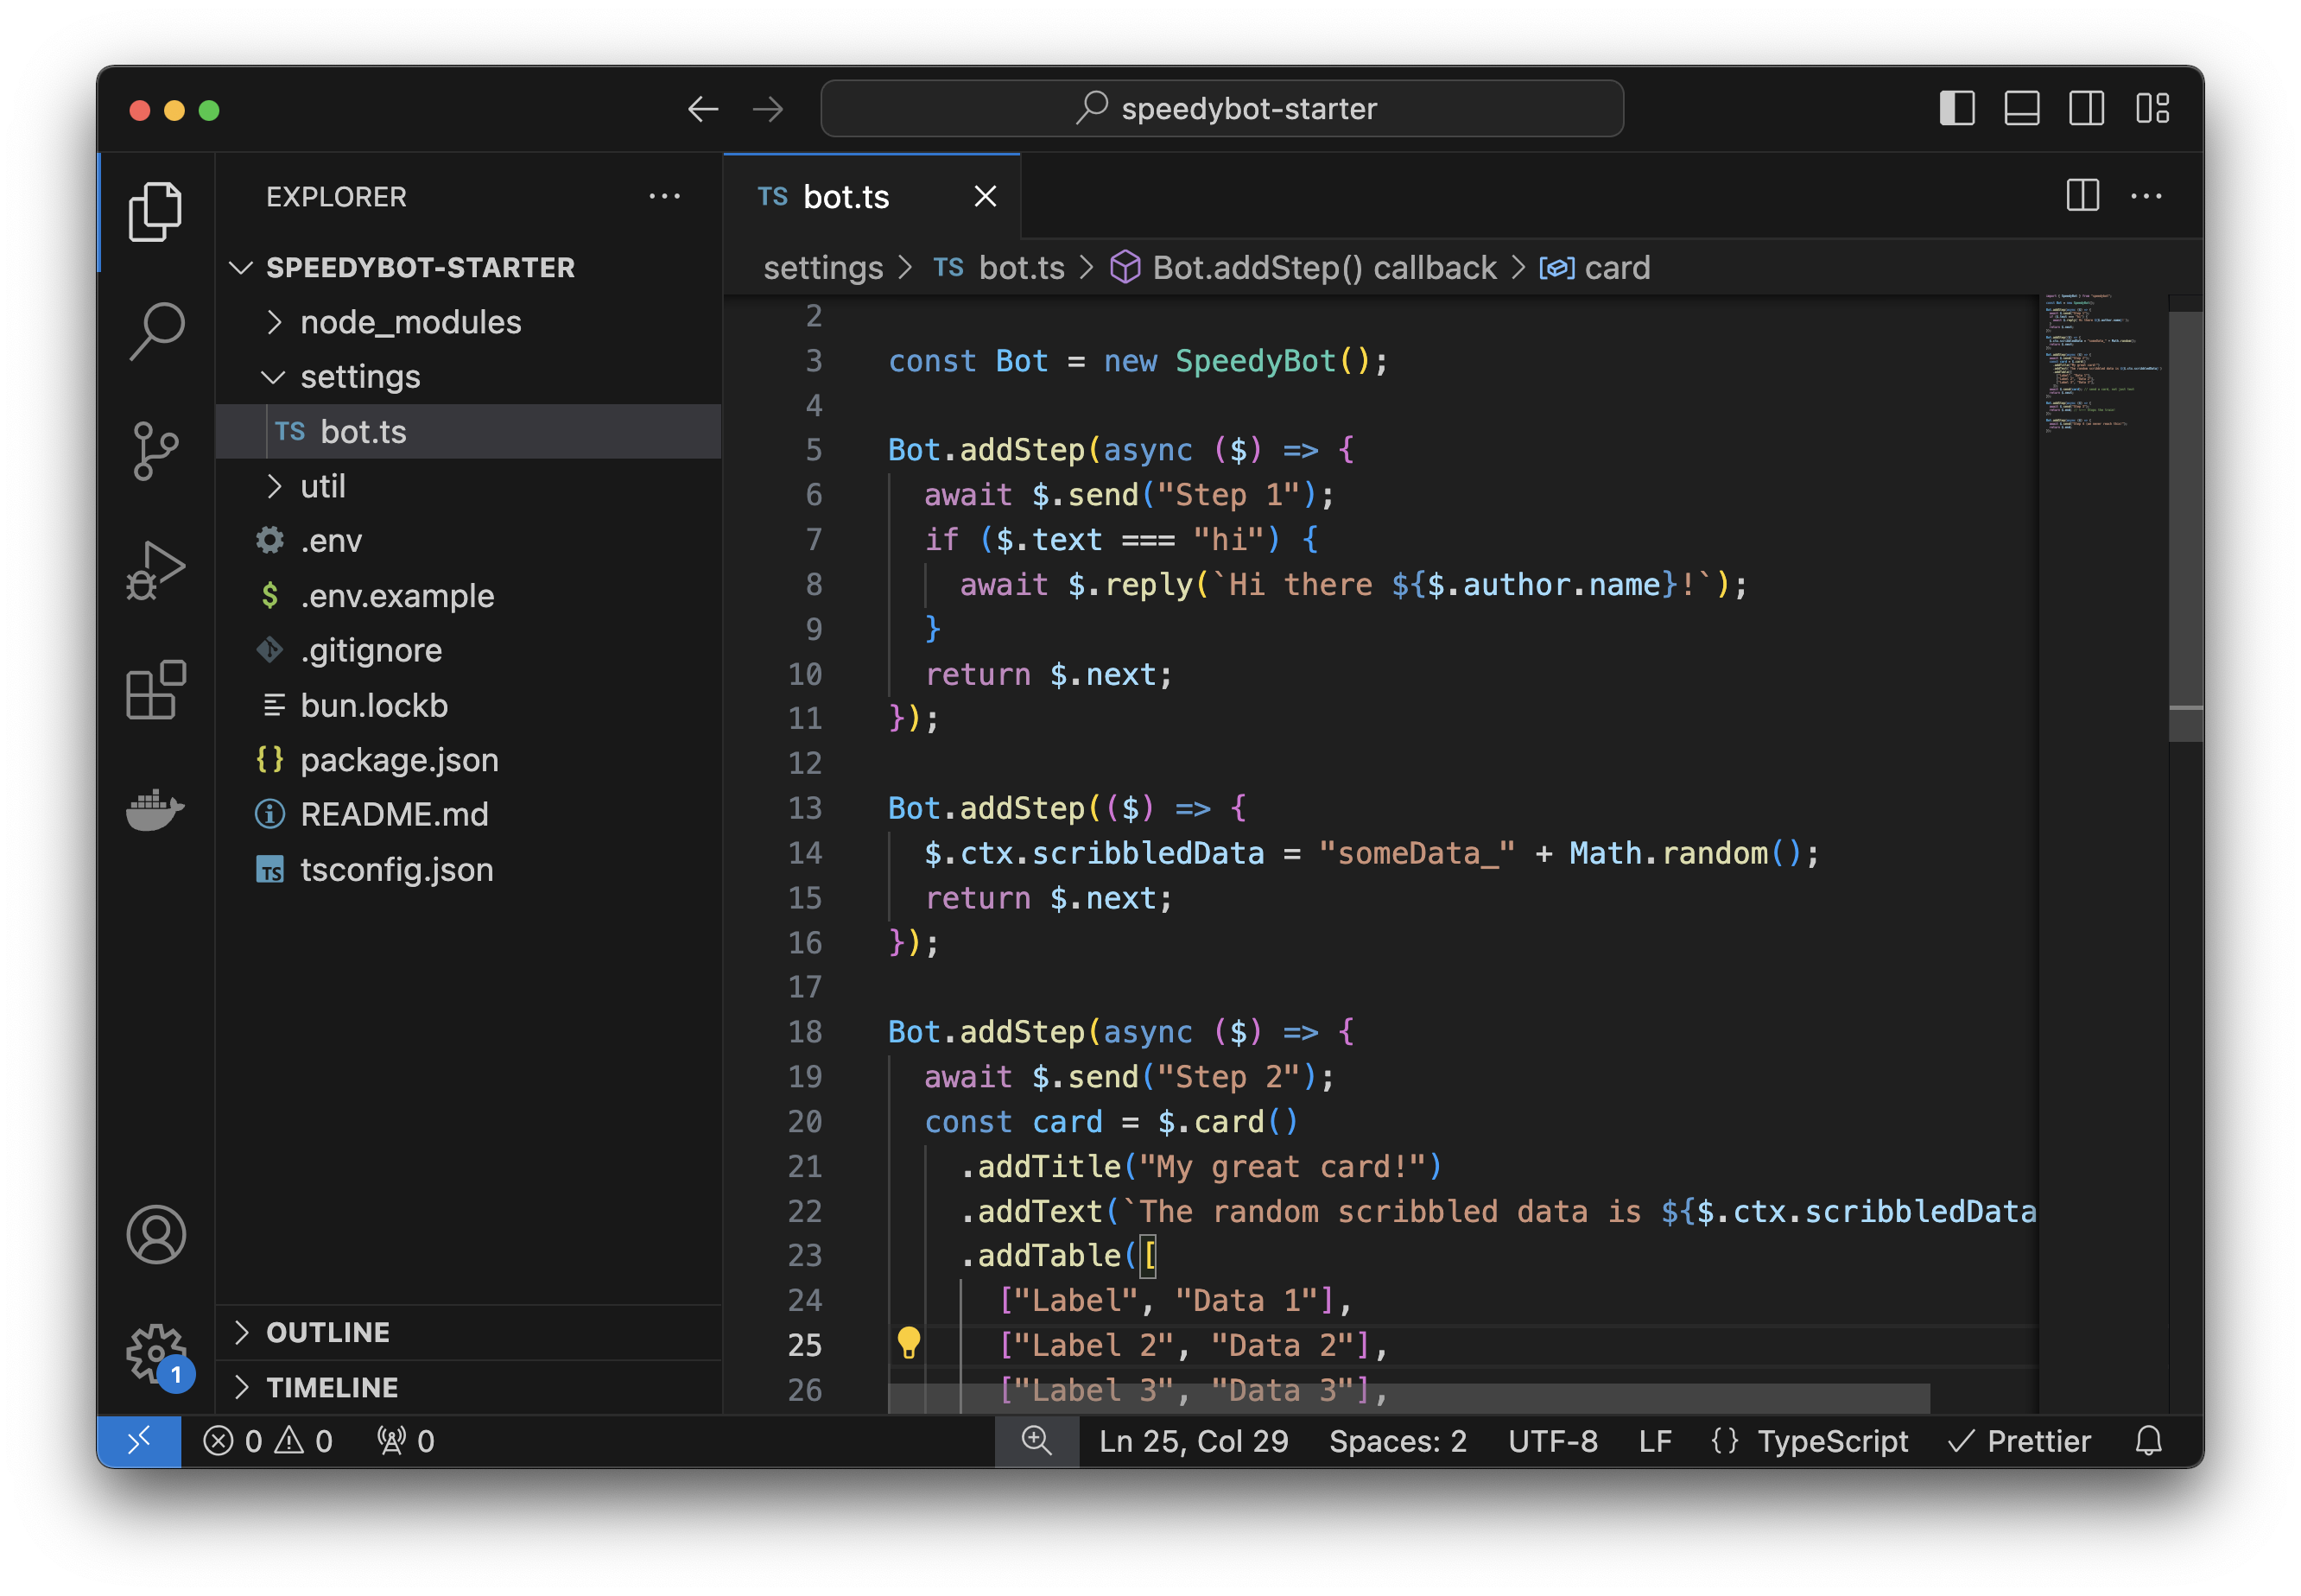
It works great with SpeedyBot and even provides helpful hints as you build ex.

When adding functionality to your bot the only file you'll need to modify is the bot.ts file and SpeedyBot will take care of the rest. See here for the details but the tl;dr version is that anytime a user sends your bot a message, uploads a file, or clicks submit on a SpeedyCard SpeedyBot will follow your instructions and take actions on the user's behalf.
With SpeedyBot you can really do it all-- start a conversation, communicate with a large language model, call out to 3rd-party APIs/services, add a document to an embedding/vector database, and generally handle user input in any way you choose.
Live reload
You can now customize this bot however you want by editing the file settings/bot.ts in your code editor. Note that if your bot is running, when you make a change and click save your bot will auto-reload and instantly reflect your changes.

Whether you're just starting out on your conversation design journey or a seasoned pro, SpeedyBot has you covered for crafting bots that can do it all-- securely integrate w/ LLMs + content management systems, process file-uploads, segment content based on user data + behavior, let users upload documents and then 'chat' with them using an LLM and a R.A.G. pattern, create + manage SpeedyCards, ask for a user's location in a privacy-respecting way, and much more.
When you're ready to deploy it to a server, serverless function or virtually any infrastructure/device, check out the examples