[QUICKSTART] 🗣 Build a Bot with Voiceflow
tl;dr: If you find yourself writing extensive text parsing code, stop it and delegate content handling to tools that leverage conversation design and natural language. This approach can enhance your agent's capabilities and provide a more refined experience for your users
This project is basic scaffolding for a "CultureBot"-- a friendly and simple agent that will provide its host team with efficient and speedy access to their most commonly used internal resources/tools/links
CultureBot is very bare bones intended to be extended-- it's a foundation upon which to build. It could really shine with natural language understanding since it's integrated with Voiceflow conversation design tooling
With SpeedyBot, CultureBot will properly render rich components like buttons, cards, suggestion "chips", carousels, urls, images, etc all specified by a conversation designer in Voiceflow
"Conversation Design"
The days of manually writing keyword handlers or matching text with RegEx's are quickly coming to a close-- users need to be able to communicate with agents in natural language. Additionally agents need to have great content designed by people who are guided by real-world usage and research. LLMs are tragically not a magic "get-out-jail-free" card for conversation design-- these agents need to be good and actually do useful things for users
This repo serves as a starter of how to build complex, user-valuable agents where the "content" is separated from code.
Follow the steps below to quickly get your own CultureBot up and running
Note: The setup steps below (except importing and publishing your Voiceflow project) can be automated with a simple setup command too:
npx -y speedybot@^2.0.0 setup --project voiceflow -e BOT_TOKEN -e VOICEFLOW_API_KEY --install --boot1) Fetch repo & install deps
git clone https://github.com/valgaze/speedybot
cd speedybot/examples/voiceflow
npm i
2) Set your bot access token
Make a new bot and note its access token from here: https://developer.webex.com/my-apps/new/bot
Copy the file .env.example as
.envin the root of your project and save your access token under theBOT_TOKENfield, ex
BOT_TOKEN=__REPLACE__ME__3) Create an agent in Voiceflow
If you don't have a Voiceflow account, create one here: https://creator.voiceflow.com/signup and login
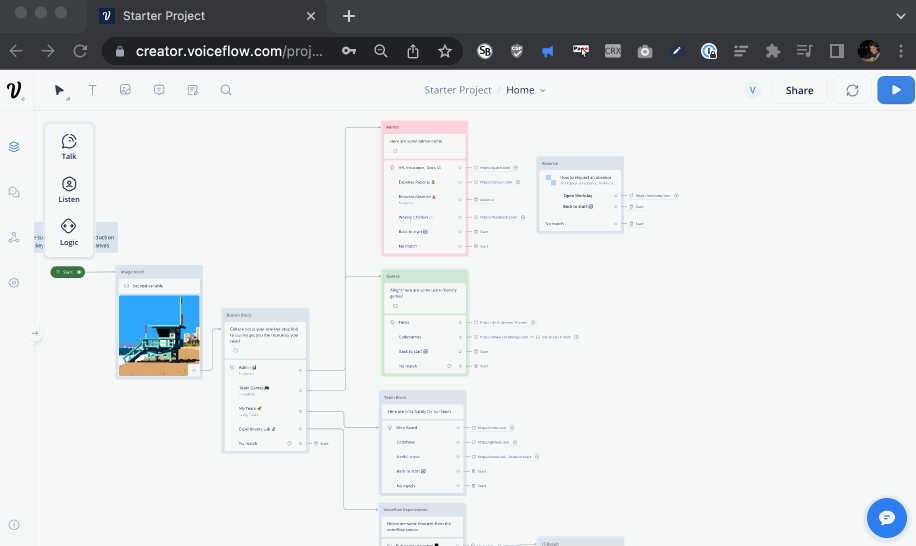
From your Voiceflow dashboard, find the import button in the top right corner and import the project file (settings/voiceflow_project.vf) to get up and running quickly
The import flow will look roughly like this:
4) "Publish" your Voiceflow agent
- Tap the "Publish" button in the top right corner

Important: If you make a change in Voiceflow, press publish to make those updates available to your agent (make sure you publish your project at least once before proceeding)
5) Grab your Voiceflow API Key
- On your way out of Voiceflow, tap the Voiceflow integrations button from the sidebar and copy the API key
- Save the key under the
VOICEFLOW_API_KEYfield in *.env from earlier-- when you're finished it should look something like this:
BOT_TOKEN=NmFjNODY3MTgtNWIx_PF84_1eb65fdfm1Gak5PRFkzTVRndE5XSXhfUEY4NF8xZWI2NWZkZi05NjQzLTQxN2YtOTk3
VOICEFLOW_API_KEY=VF.DM.12345cbc8ef.sjaPjTtrgn
Custom runtime?
Custom runtime: If you have a custom runtime/endpoint (ie the URL you see in the integration tab sample is something other than https://general-runtime.voiceflow.com), you can swap the BASE_URL value in settings/voiceflow.ts
6) Boot it up!
Start up your agent with the following command:
npm run devNote: To start the agent will run locally on your machine so you won't need to worry about details like deployment or webhooks. Later down the line when it's time to deploy your agent on a server or serverless function SpeedyBot's got your covered with options
7) Take it for a spin

This sample is intended to be extended-- change content on Voiceflow, publish them and see the new content in your agent without any extra steps. If you want to handle file uploads (and pop them into a Knowledge Base to implement a R.A.G. pattern using an LLM), check out the Voiceflow Knowledge Base sample