[QUICKSTART] 🗣 Build a Bot with Voiceflow Knowledage Base (RAG)
tl;dr: Create specialized WebEx bots with direct document integration to overcome the tendency of large language models (LLMs) to make things up-- documents can be securely added to a 'Knowledge Base' requiring no specialized skills
This sample combines human-designed conversation flows with large language model (LLM) question answering based on your documents
Large language models (LLMs) have a notable feature and limitation—they tend to "hallucinate" responses (they make things up). While this characteristic of LLMs can be seen as a feature (for brainstorming or creative tasks), it poses massive challenges when building conversation systems grounded in facts
To address this, the R.A.G. (retrieval augmented generation) pattern is often used to inject relevant text snippets to guide LLMs in leveraging documents. This typically involves standing up a vector/embedding database and a lot of implementation details to get everything just right-- Voiceflow's Knowledge Base feature vastly simplifies this pattern
SpeedyBot helps close the loop and can serve a foundation for "knowledge-focused" WebEx bots
Authorized users (who do not need any special skills) can effortlessly upload documents (PDF, TXT, DOCX) under 10MB in WebEx sessions. This allow human-tuned conversation flows to complement an LLM in responding to questions
Let's get to it
Note: The setup steps below (except importing and publishing your Voiceflow project) can be automated with a simple setup command too:
npx -y speedybot@^2.0.0 setup --project voiceflow-kb -e BOT_TOKEN -e VOICEFLOW_API_KEY --install --boot1) Fetch repo & install deps
git clone https://github.com/valgaze/speedybot
cd speedybot/examples/voiceflow-kb
npm i
2) Set your bot access token
Make a new bot and note its access token from here: https://developer.webex.com/my-apps/new/bot
Copy the file .env.example as
.envin the root of your project and save your access token under theBOT_TOKENfield, ex
BOT_TOKEN=__REPLACE__ME__3) Create an agent in Voiceflow
If you don't have a Voiceflow account, create one here: https://creator.voiceflow.com/signup and login
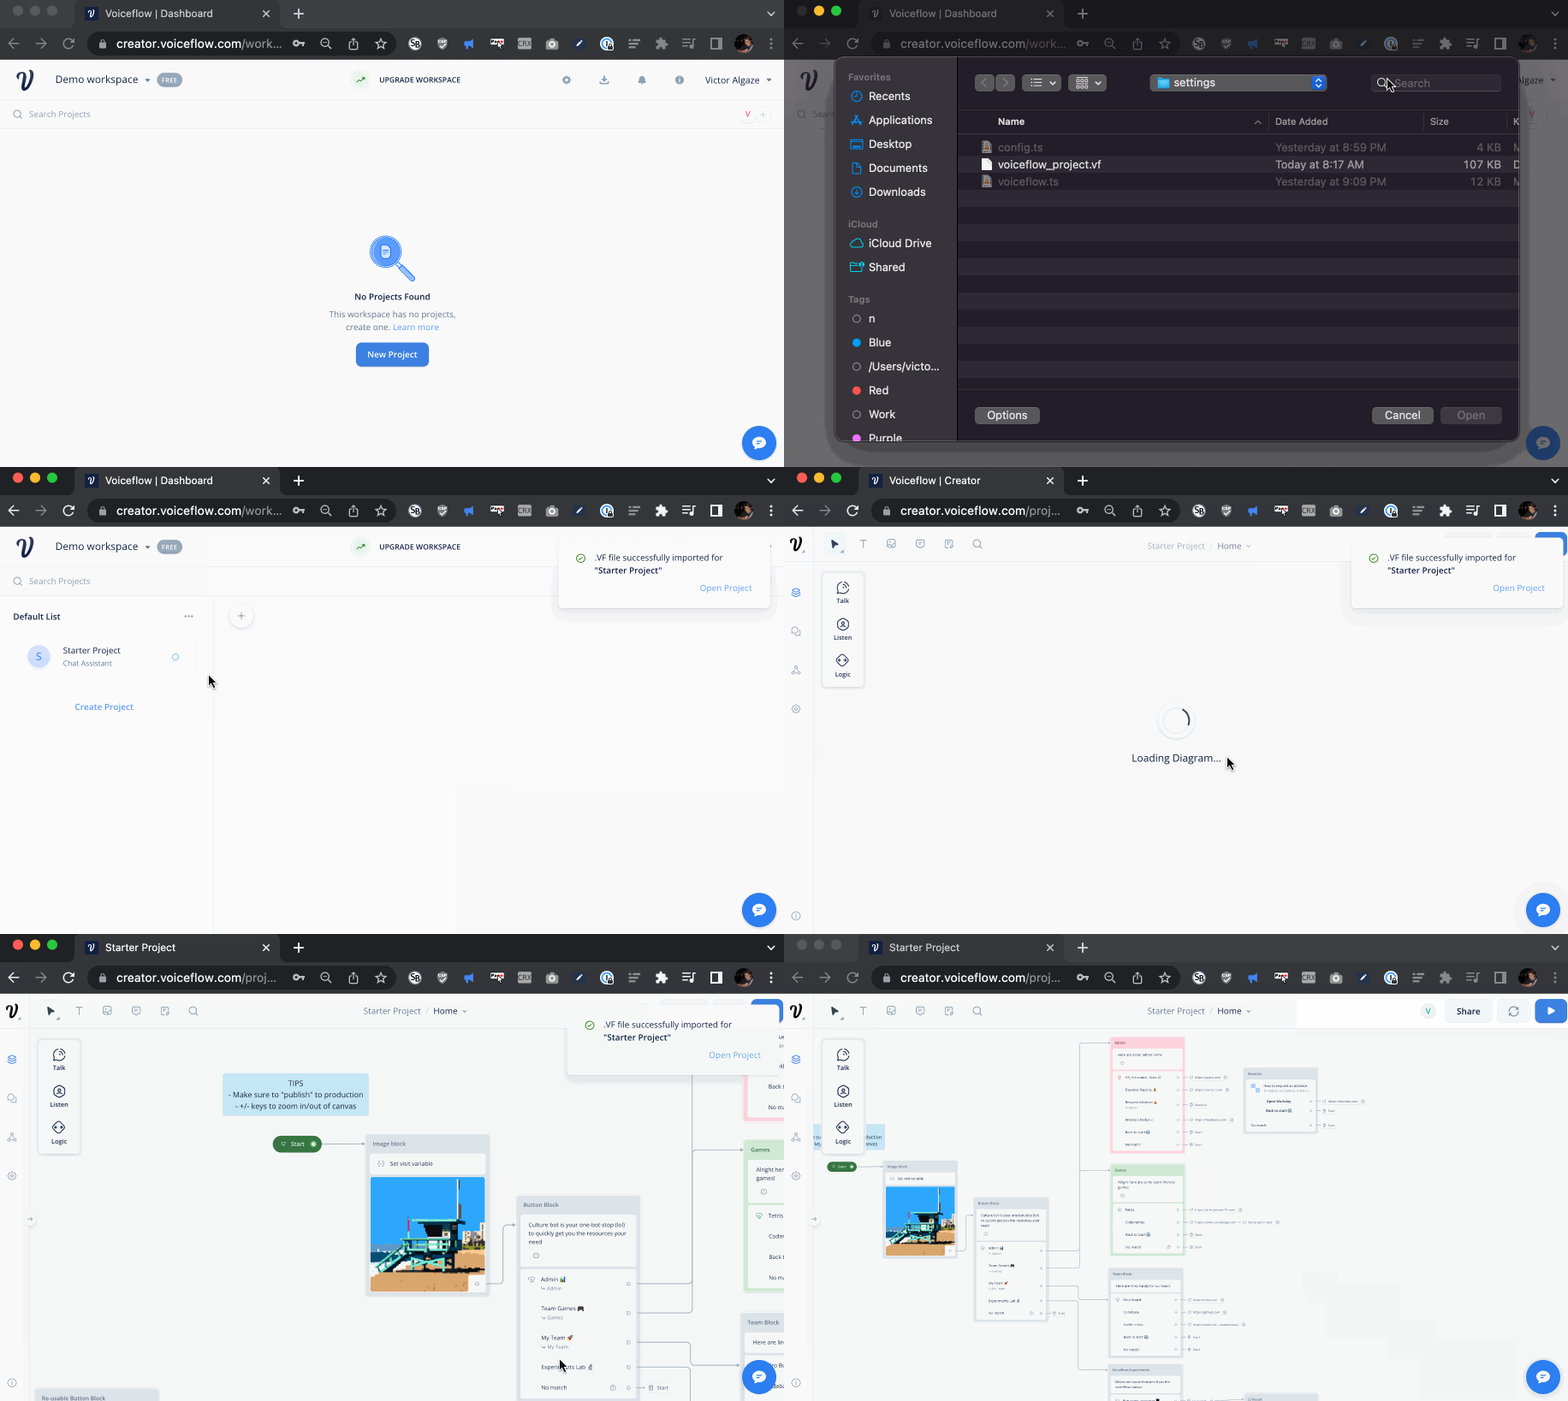
From your Voiceflow dashboard, find the import button in the top right corner and import the project file (settings/voiceflow_project.vf) to get up and running quickly
The import flow will look roughly like this:
4) "Publish" your Voiceflow agent
- Tap the "Publish" button in the top right corner

Important: If you make a change in Voiceflow, press publish to make those updates available to your agent (make sure you publish your project at least once before proceeding)
5) Grab your Voiceflow API Key
- On your way out of Voiceflow, tap the Voiceflow integrations button from the sidebar and copy the API key
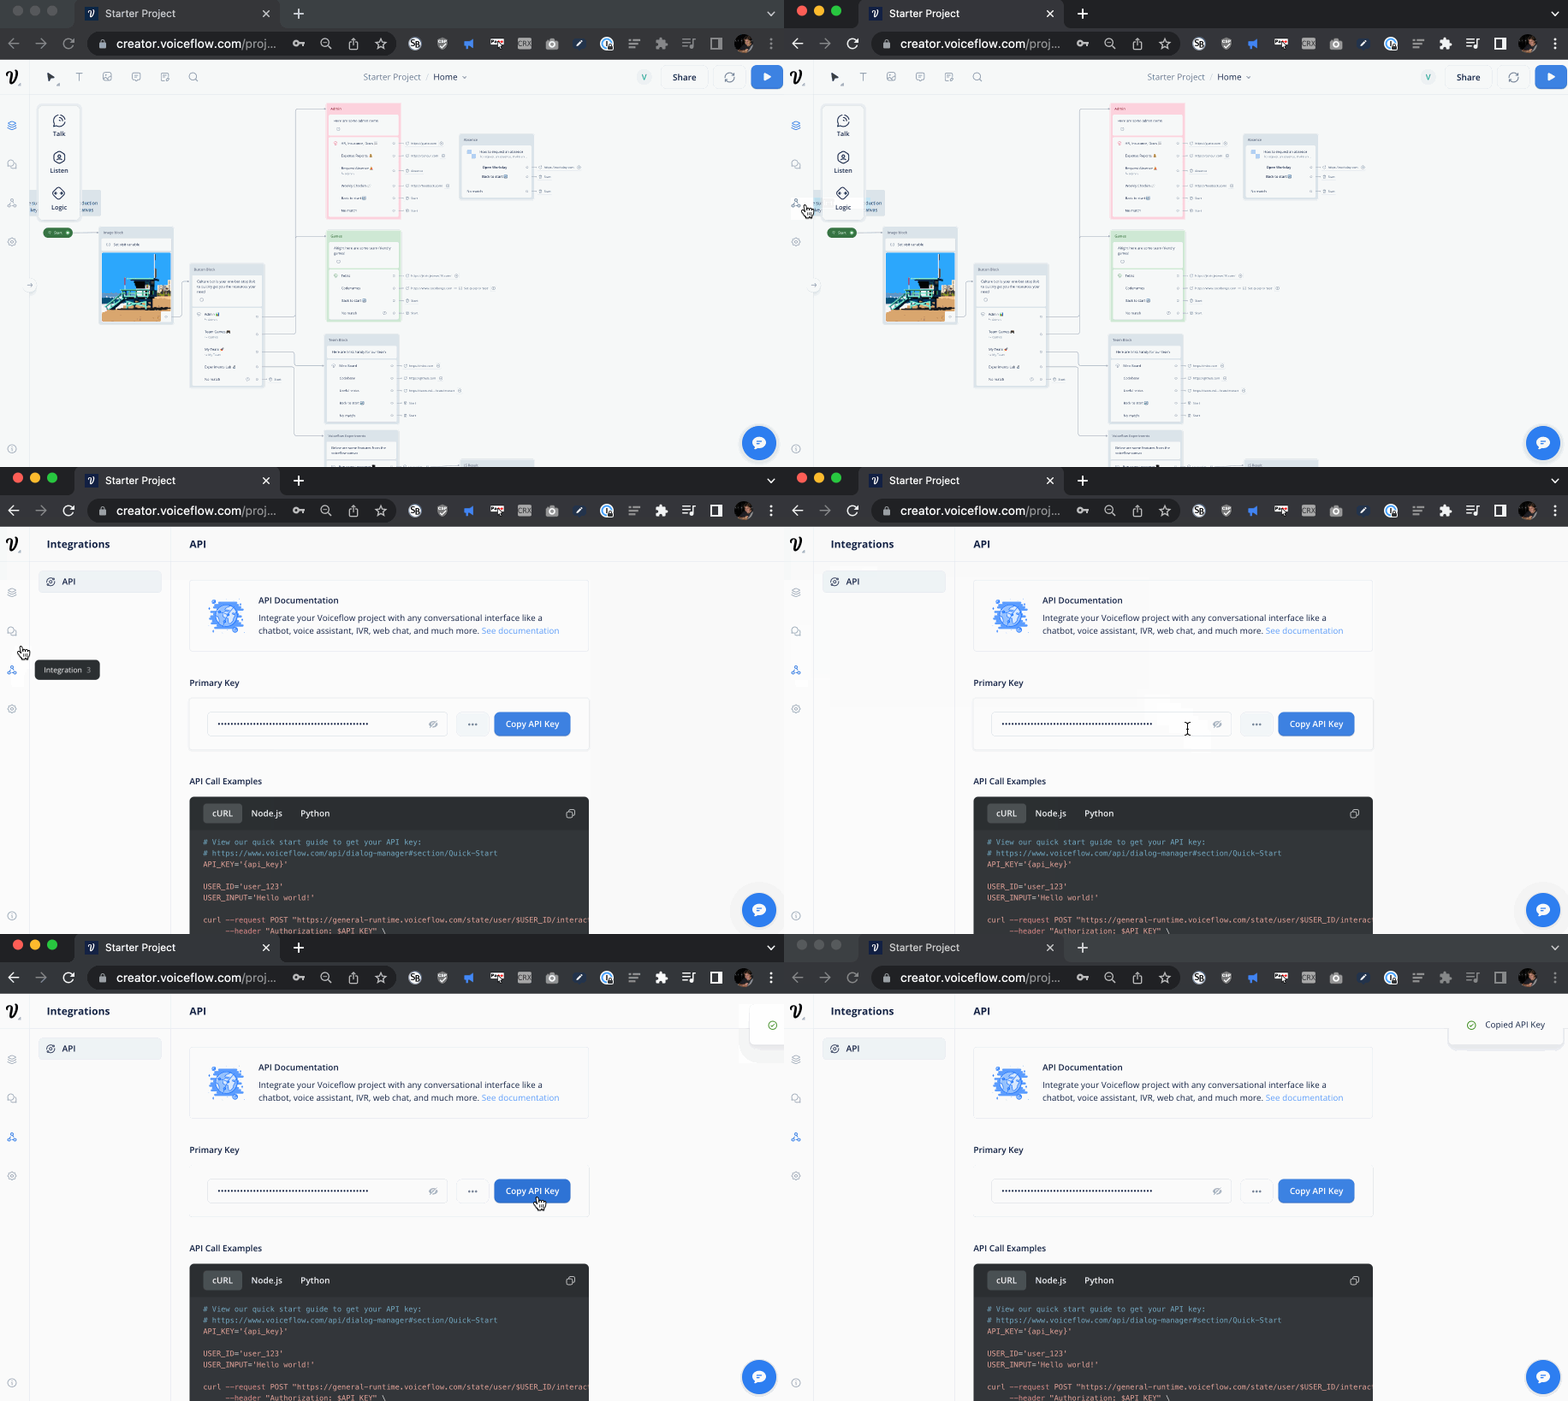
- Save the key under the
VOICEFLOW_API_KEYfield in *.env from earlier-- when you're finished it should look something like this:
BOT_TOKEN=NmFjNODY3MTgtNWIx_PF84_1eb65fdfm1Gak5PRFkzTVRndE5XSXhfUEY4NF8xZWI2NWZkZi05NjQzLTQxN2YtOTk3
VOICEFLOW_API_KEY=VF.DM.12345cbc8ef.sjaPjTtrgn
Custom runtime?
Custom runtime: If you have a custom runtime/endpoint (ie the URL you see in the integration tab sample is something other than https://general-runtime.voiceflow.com), you can swap the BASE_URL value in settings/voiceflow.ts
6) Boot it up!
Start up your agent with the following command:
npm run devNote: To start the agent will run locally on your machine so you won't need to worry about details like deployment or webhooks. Later down the line when it's time to deploy your agent on a server or serverless function SpeedyBot's got your covered with options
7) Ask about Andy
Now you can add any "facts" you want by uploading a document, but let's start with Andy
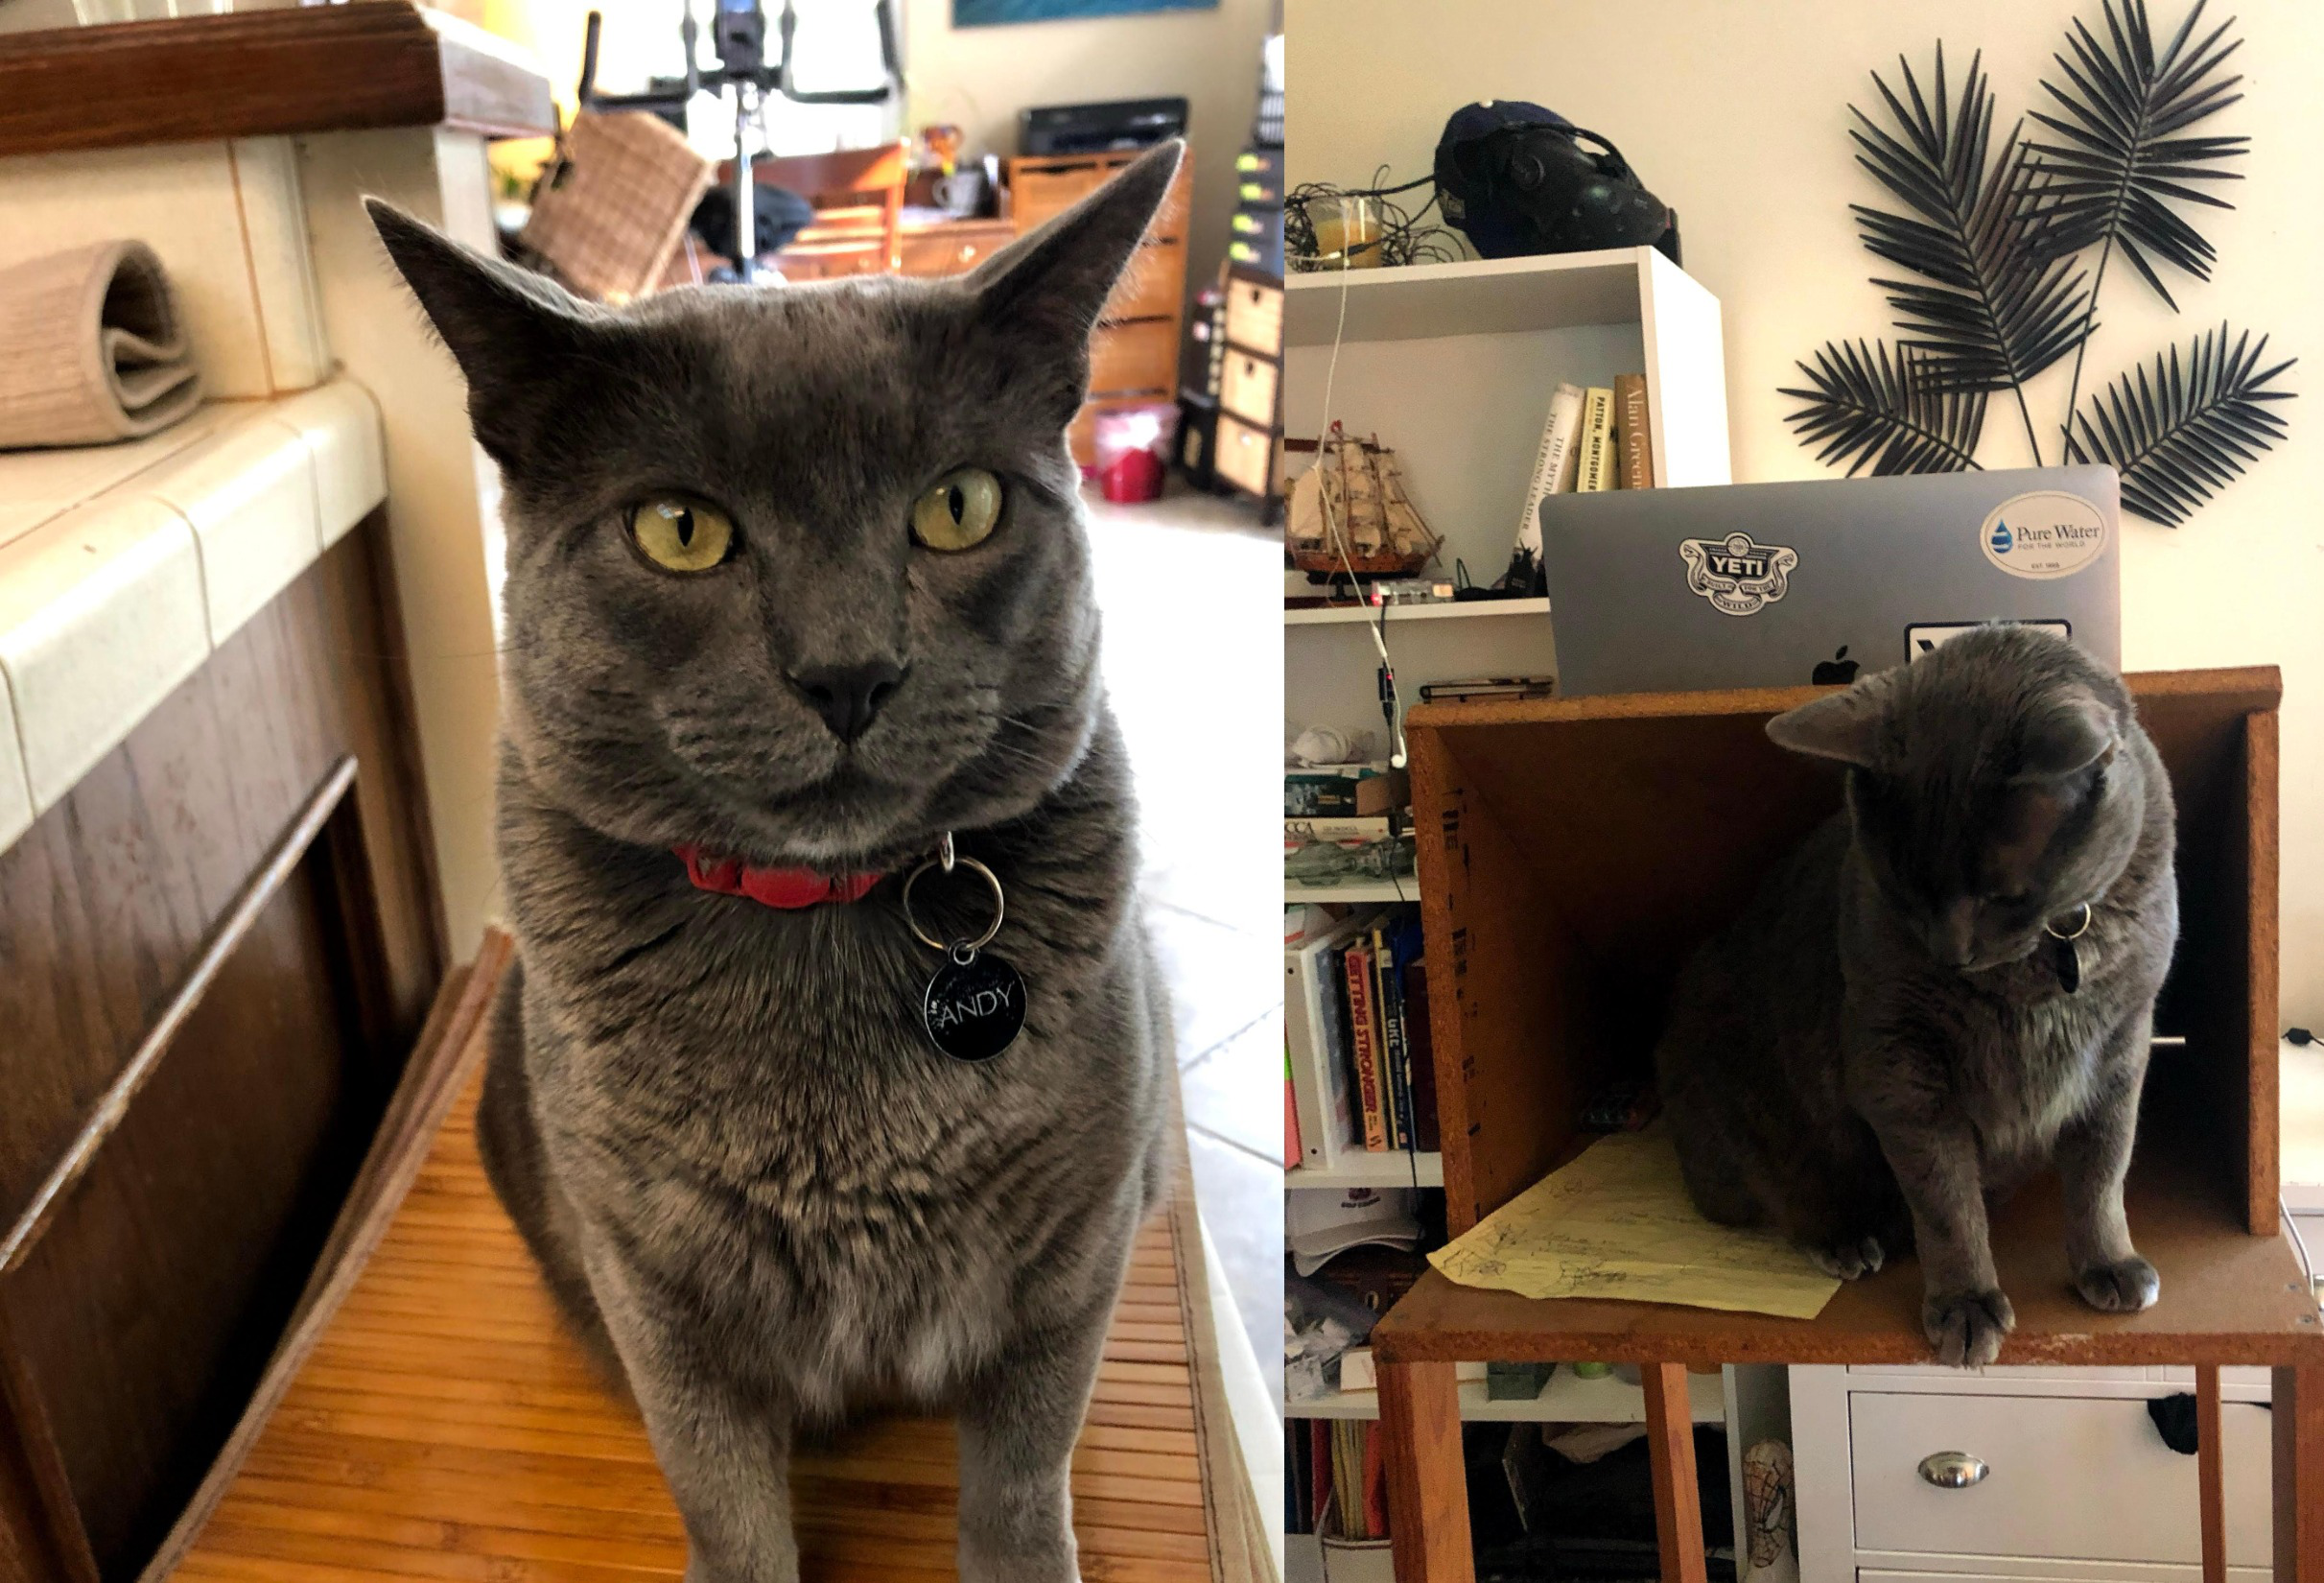
Contrived Scenario: Imagine having a Russian Blue cat named Andy in your life—- he's clever, yet often grumpy. One trick to cheer up Andy is to give him a few treats. Now, as you'll be out of town for a while, you want to create a chat agent to assist a friend taking care of your place by addressing common questions. Fortunately, you've prepared a document with helpful tips, accessible here (*.docx)
Before adding your Andy facts document, if you ask the agent to query its knowledge base about how to cheer up Andy the cat-- it will have no idea what you're talking about:
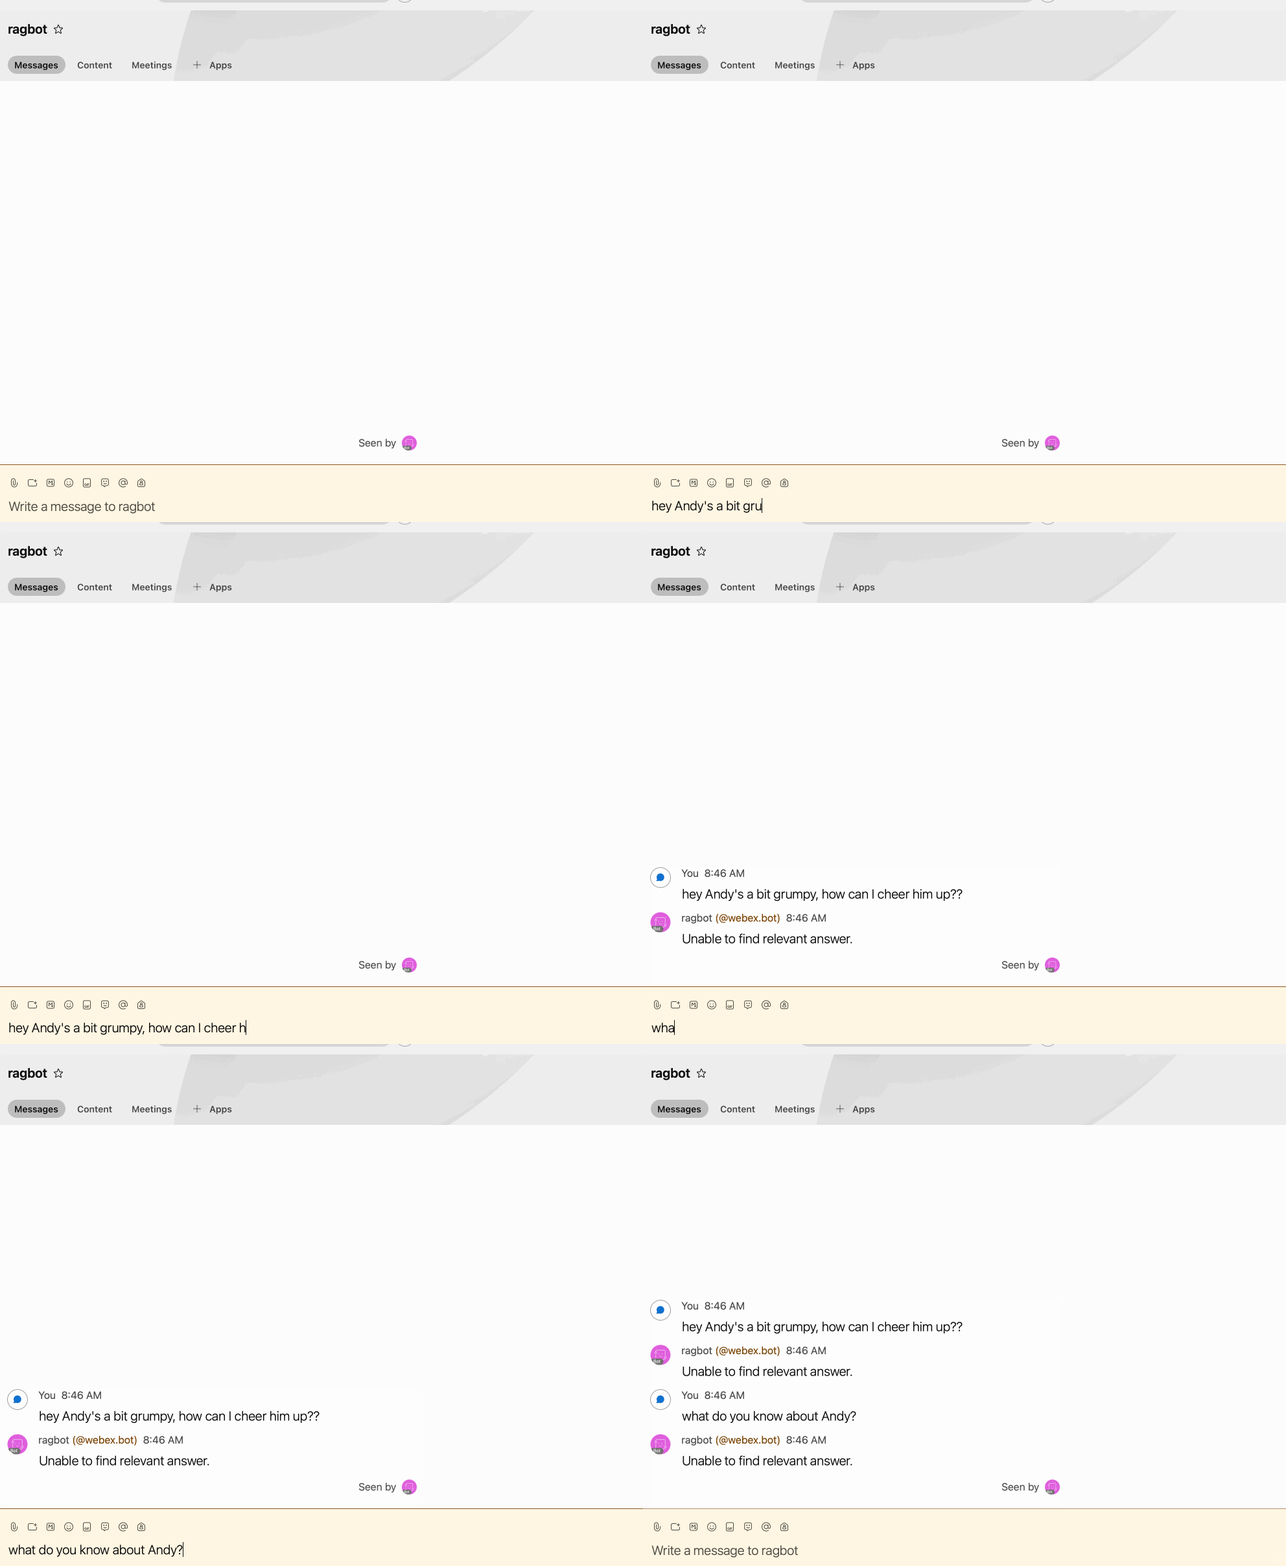
This is a GOOD thing-- Andy isn't (yet) famous enough to make it into the Common Crawl corpus used to train many LLMs, so your agent is not hallucinating or making things up. This is because it (behind the scenes) implements a "R.A.G." strategy/pattern-- before your agent attempts a generation it (1) R retrieves relevant snippets, (2) Augments the prompt with the data and (3) Generates a response based on that data.
This is opposed to asking a similiar question to a "raw" LLM-- an impressive-sounding but ultimately irrelevant answer, ex:
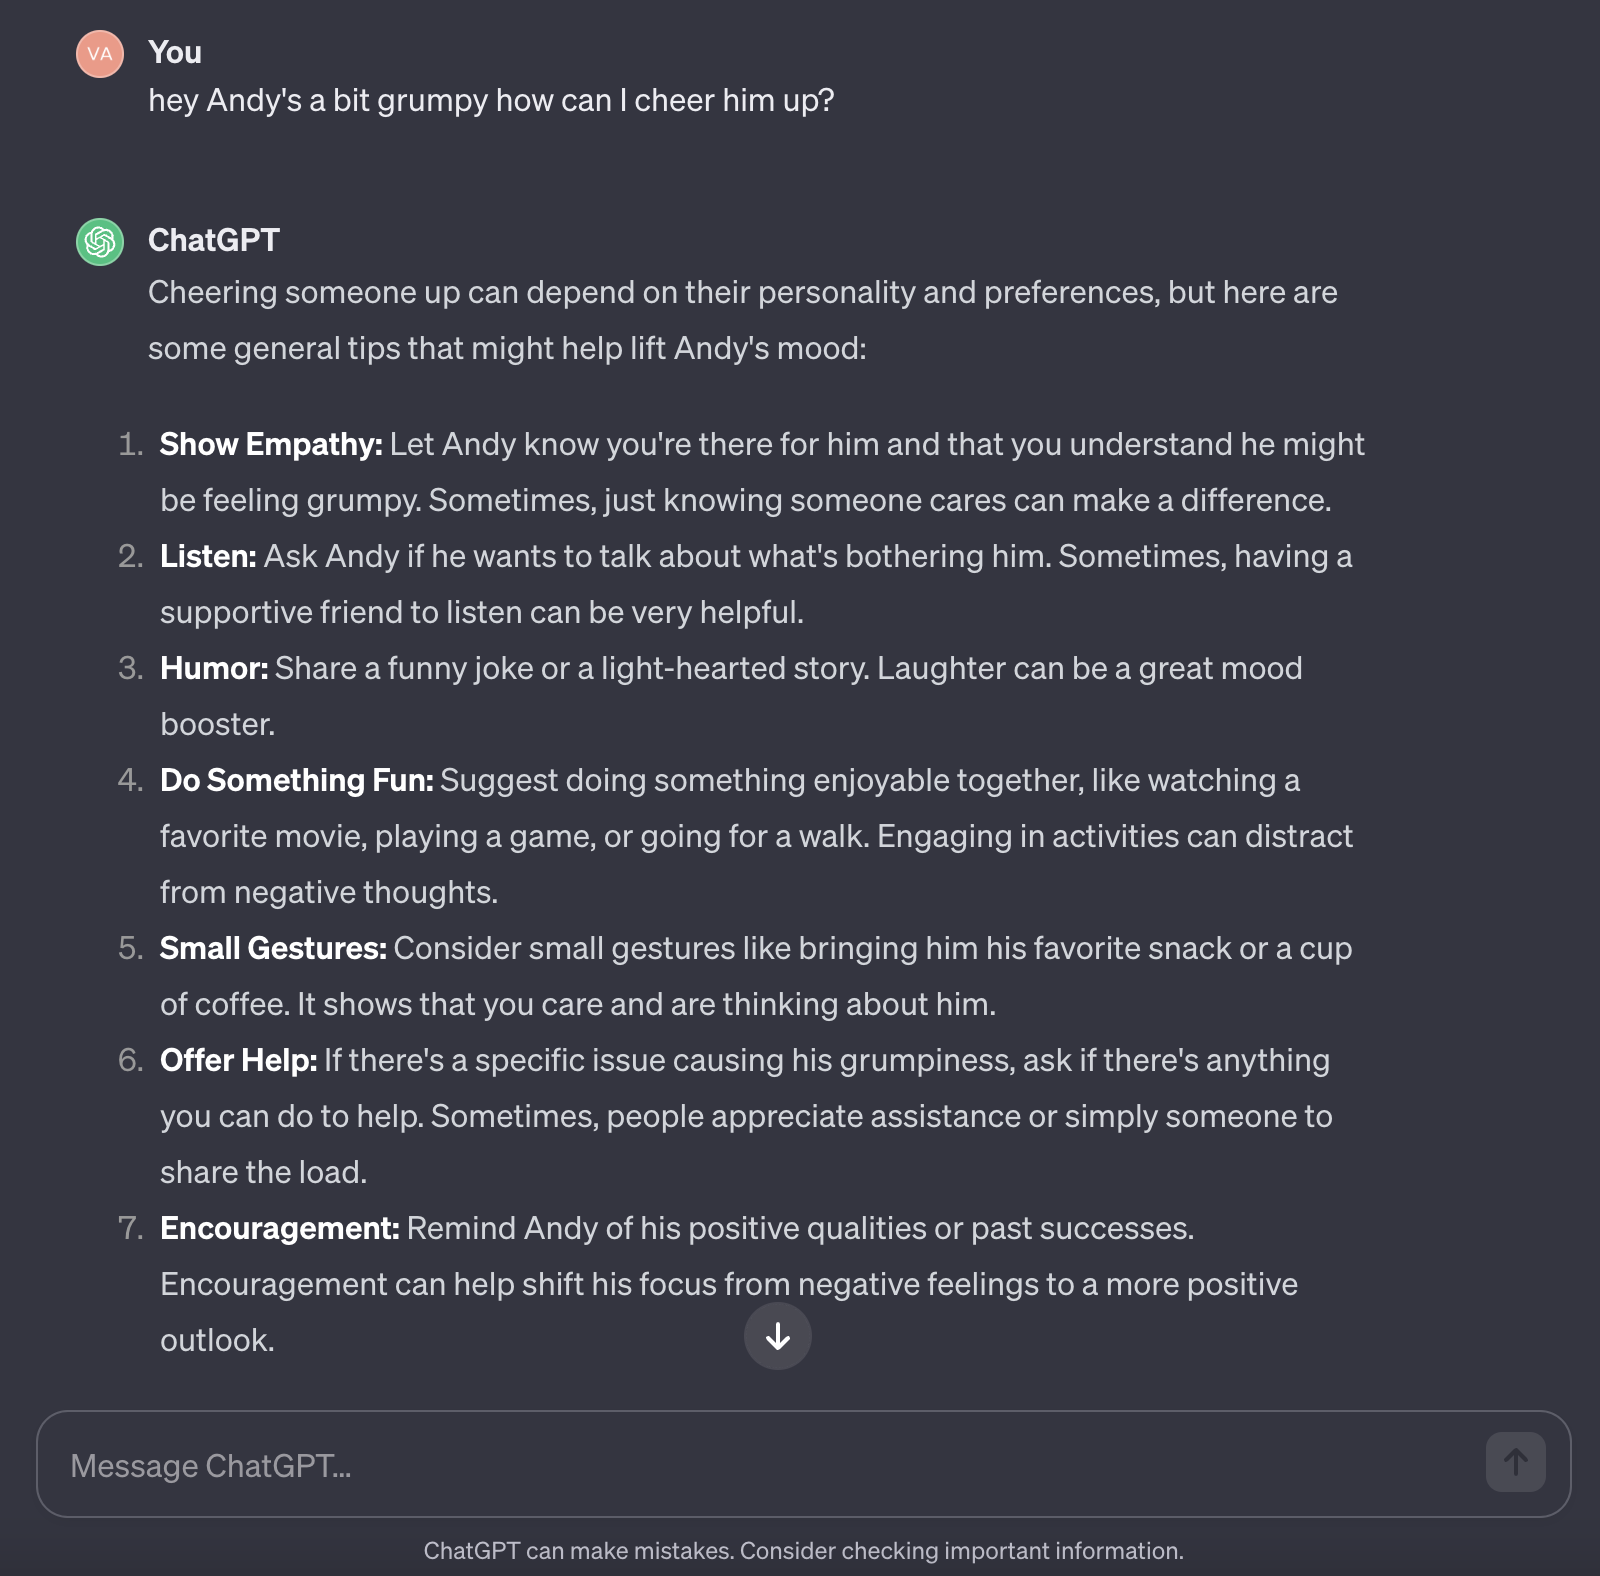
So you have an agent that combines human-written conversation design and an LLM that so far is not making things up, which is good but you still have a grumpy Russian Blue on your hands
8) Add Some Andy Data
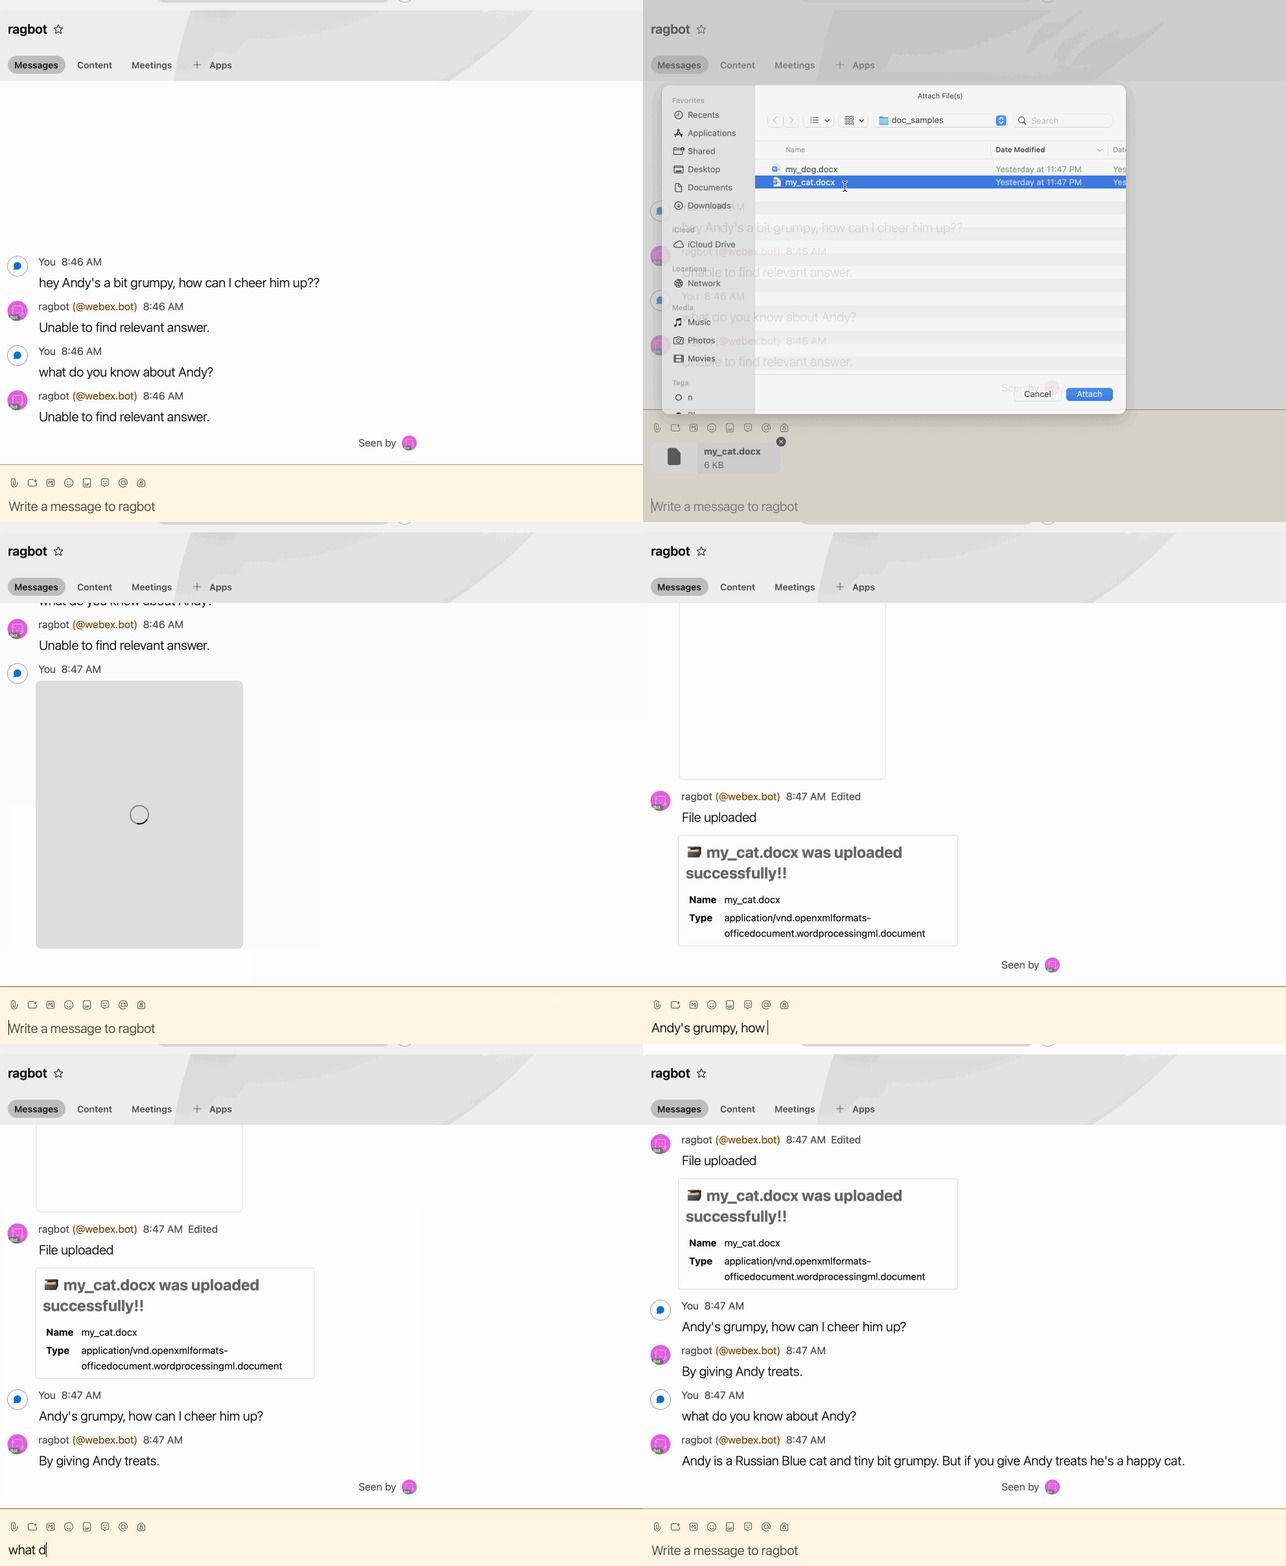
You can take your Andy document (*.docx), upload it to your agent (which will then added to the Knowledge Base) and now you can ask a question and answers steered by your contributed document
9) Expand
Again this is a contrived example (and a very barebones "agent"), but could be the basis of a very powerful pattern-- imagine an agent that can answer questions and empower trusted/vetted users upload documents without any knowledge or special skills required. A conversation designer in turn can make adjustments on the Voiceflow canvas.
As always, if you need to deploy this to server-ful/serverless infrastructure, check out the deployment examples and just copy over your customized settings/ directory to get up and running fast.
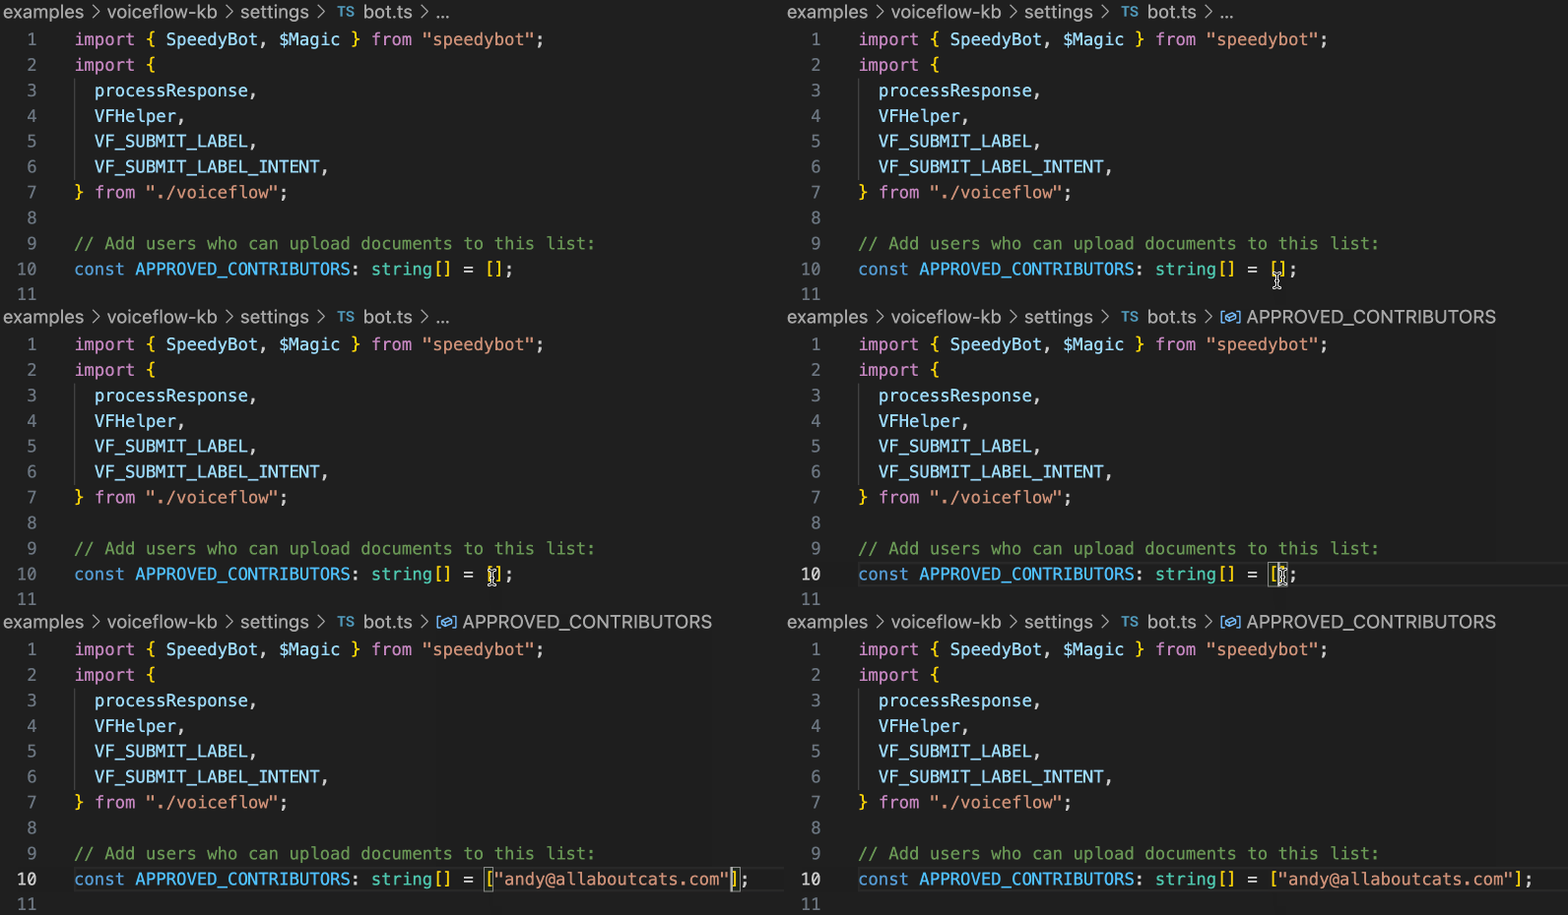
Note: If you want to restrict users who can upload documents to a specific list, open up bot.ts and edit the APPROVED_USERS list, ex
In meantime, give Andy some treats 🐈